OpenVox WGW1002G – Useful hints
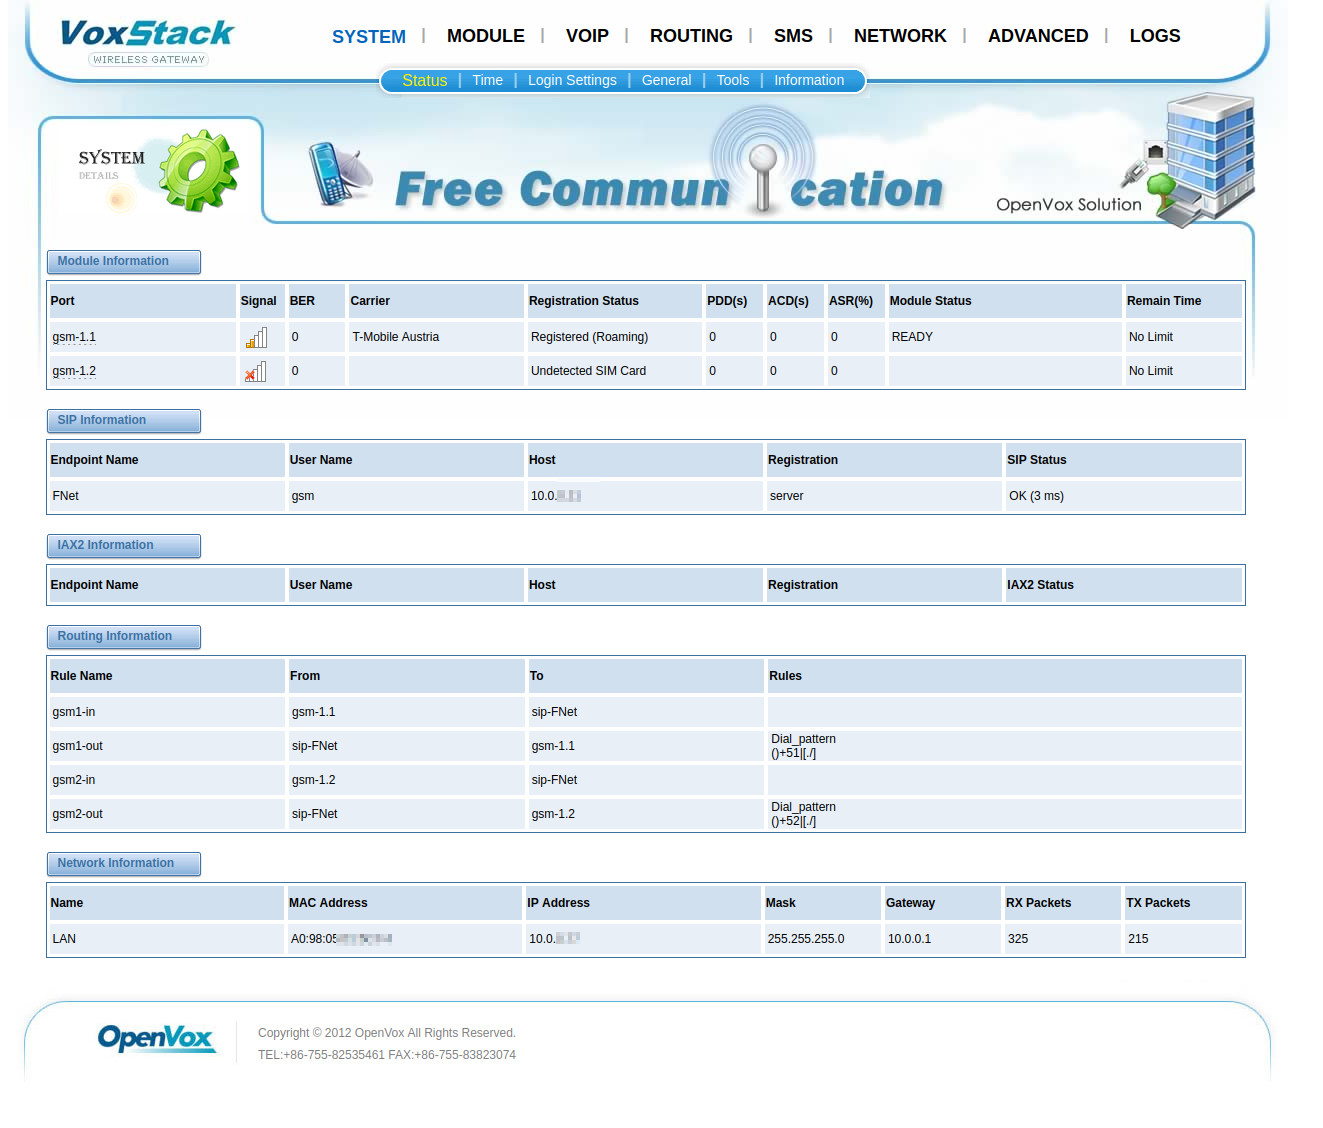
So I recently got myself a GSM gateway (the seller also sent me some helpful resources, thanks so much!) for my Asterisk server, it’s a OpenVox VoxStack WGW1002G (VS-GWM400). This page is a collection of things that might be useful for some people. All of these commands have been tested on firmware version 2.5.8 (Build Time 2019-12-24 13:51:54).
Enabling SSH
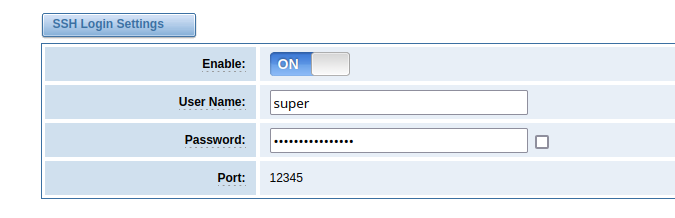
You’ll need SSH for some cool stuff! Go to System → Login Settings and enable the SSH Login.
Important: You’ll only have root access if you do not change the default SSH user from super to something different!
Also, you might need to tweak your SSH client to be able to connect. The GSM gateway still uses ssh-dss, and OpenSSH disabled ssh-dss by default a while ago, so something like this might work:
ssh -oHostKeyAlgorithms=+ssh-dss super@<ip> -p12345Also something to be aware of: The key of the SSH server changes with each restart. It’s a bit annoying.
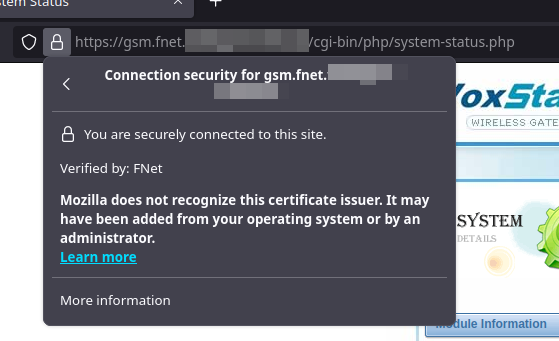
Custom SSL/TLS certificate for the web interface
I like to roll my own CA for internal networks. Nice thing with this gateway: Even though it’s not officially supported, you can change the certificate that’s used for the web GUI.
First, enable and connect via SSH as described above. Switch into the asterisk/gw directory:
cd /etc/asterisk/gwNow, place your certificate in PEM format including the private key into this exact folder. I just opened up vi, pasted the certificate there (it took around a minute for the pasting to complete) and saved it as server.pem – you can choose any name you like tho. Here’s an example of the required format:
-----BEGIN RSA PRIVATE KEY-----
DEqPXfAiiDGsp9Q....
-----END RSA PRIVATE KEY-----
-----BEGIN CERTIFICATE-----
RFCdhIrYNGgh3B1wlCuk9...
-----END CERTIFICATE-----
Now, edit lighttpd_https.conf (still in the same folder) to point to your newly saved certificate:
ssl.engine = "enable"
ssl.pemfile = "/etc/asterisk/gw/server.pem"
After that, execute the following command to write the newly created/changed files back to the gateways flash:
/my_tools/sync2flash .And now, the grand finale – reboot the whole thing. You’ll never guess the command to do so:
rebootWhen the device and embedded web server is up again, your certificate should be deployed – no more warnings! 😉
No comments yet.